

Item List

"LM-Cam"でビデオ会議ツールの映像をより高画質に!ZOOM、Teams、Google Meetなどの設定方法
中継など生配信で利用する際など、Zoom、Team、Google Meetなどの主なビデオ会議ツールの映像画質を向上させたいという要望が多くあります。 その際、カメラアプリ"LM-Cam"を使用し、ご利用のPCの設定を変更することでより映像を高画質にご利用することができます。 【用意するもの】 LM-Cam カメラアプリ NDI.tv NDIツール
→事前にご利用のOSにあった「NDIツール」をインストールください。 Zoom、Teams、Google Meetなどのビデオ会議ツール WindowsとMacで設定方法が異なるので、ご自身の利用しているOSにあった方法をご確認ください。 Windows設定方法 Mac設定方法 Windowsの設定方法 NDI5 Toolsの設定 a.NDI5 Toolsをインストールし、Windows のスタートメニューを開き、「NDI 5 Tools」の中から「Webcam Input」 を選択します。 b.「Webcam Input」アプリを起動すると、右下の常駐システムに通知画面に表示されます。 c.アプリ「LM-Cam」を起動し伝送(赤いボタン)を開始します。 システムトレイ(デスクトップ右下)にある「Webcam Input」のアイコンを選択し右クリック。 1番目:ネットワーク上で現在アクティブなすべての"NDIデバイス"が表示されます。 重要:LM-Camを伝送していると表示されます。表示されない場合LM-Camを搭載したiPhoneとあなたのコンピューターが同じネットワーク上にあることを確認してください。 2番目:バーチャルウェブカムとして使用するNDIソースのオーディオとビデオのオプションがあります。 ※LM-Camを伝送していないと表示こちらが1番目に表示されます。 3番目:ヘルプやその他のオプション。 注:オーディオ(レベル、チャンネル)やビデオ(解像度)のオプションを調整する必要はありません。ただし、必要に応じて調整することは可能です。 1番目のiPhone、"LM-Cam"を設定してください。 ※必ずしも必要ではありませんが、HX2 HEVCに切り替えると、回線帯域を圧縮することができ快適にネットワークを利用することができます。(HX2ではビットレートの調整も可能)。 2.ビデオ会議ソフトの[ビデオ]設定をします。 各ビデオ会議ソフトのカメラ設定から、[NewTek NDI Video]を選択すると、LM-CamからのストリームがPreviewウィンドウに表示されます。 各ビデオ会議ソフトのカメラ設定方法はこちら↓ 1.ZOOM 設定→ビデオ→カメラ 2.Teams 設定→デバイス→カメラ 2.Google Meet 設定→動画→カメラ 以下各ビデオ会議ソフトのカメラ設定方法となります。こちらで紹介してもの以外でも、各ビデオ会議ソフトでは"カメラ"設定が可能なので、同じような方法で変更が可能となります。 Macの設定方法 NDI5 Toolsの設定 a.NDI5 Toolsがインストール完了したら、デスクトップ上でCommand(コマンド)+Space(スペース)を押し、Spotlightを開いたら「NDI Virtual Input」と入力。NDI Virtual Inputを起動します。 b.アプリ「LM-Cam」を起動し伝送(赤いボタン)を開始します。 そして「NDI Virtual Input」のメニューバーにある「NDI」をClickすると、現在アクティブ状態にあるNDIが表示されますので、LM-Camを伝送している端末を選択します。 2.ビデオ会議ソフトの[ビデオ]設定をします。 各ビデオ会議ソフトのカメラ設定から、[NDI Video]を選択すると、LM-CamからのストリームがPreviewウィンドウに表示されます。 各ビデオ会議ソフトのカメラ設定方法はこちら↓ 1.ZOOM 設定→ビデオ→カメラ ※パソコンによっては「NewTek NDI Video」ではなく「NDI Video」と表示されます。 2.Teams 設定→デバイス→カメラ ※パソコンによっては「NewTek NDI Video」ではなく「NDI Video」と表示されます。 2.Google Meet 設定→動画→カメラ ※パソコンによっては「NewTek NDI Video」ではなく「NDI Video」と表示されます。

LM-Cam v3.22 公開!Fragment MP4であやまってアプリを切っても安定録画を実現
このたび、LM-Camは最新バージョン v3.22 をリリースいたしました。 本バージョンでは、Fragment MP4 を実装。録画中にアプリが誤って終了してしまった場合でも、録画データの断片情報を元に動画を復元し、最後までスムーズに再生できるようになりました。これにより、長時間の撮影や重要なシーンを安心して残せるだけでなく、編集時の手間も大幅に軽減。 さらに、従来より動作負荷を抑えた内部処理を採用し、バッテリー消費と発熱を最適化。LM-Camは、クリエイターの撮影体験をより快適かつ信頼できるものに進化させます。 ぜひ最新バージョンをダウンロードして、新機能の効果をお確かめください。今後ともLM-Camをよろしくお願いいたします!

LM-Cam 基本機能 使い方ガイド
User Guide Engulish ver. 2025年10月7日 更新 <使用上のご注意> ・Wi-Fi環境でのご利用を推奨いたします。 ・スマートフォンのBluetoothはOFFにしてご利用されることを推奨いたします。
・最新iOSでのご利用を推奨しております。 [よくある質問] 色温度 / 色合い設定 色温度(TEMP) / 色合い(TINT)を設定することで、よりきれいな映像を作り込むことができます。 撮影環境に応じてシンボル(記号)を選ぶことによって自動で映像を調整をすることが可能となります。(AWBを選択した場合は自動で調整となります。) ISO / FOCUS設定 画面をタップすることでカスタムモードとなり、FOCUS/ISOのアイコンを上下することで手動調整をすることができます。 絞り スライダーを上下に移動させることによって、カメラに取り込む光の量を調整することができます。 画面ロック 画面上にある鍵をタップすると画面全体がロックされ、誤ったタップのご動作を防ぐことができます。 ZOOM デジタルズーム設定方法 倍率ボタンを長押しすることで「デジタルズーム」の利用が可能となります。 調整完了後タップを離すと、「デジタルズーム」の設定が解除されます。 マイクOn/Off マイクマークをタップすることで、映像の音声をOFFにすることができます。 イン / アウトカメラ切替 インカメラとアウトカメラの切替を行うことができます。 ふた絵機能 LM-Camにふた絵をUPすることで、ブロードキャストソフトなどを利用することなく、ふた絵設定をすることが可能となります。トランジションはカットとフェードの2種類を使用できます。 ※ふた絵のUP数は最大で5枚となり、対応している画像はPNG、JPGとなります。推奨サイズ:1080 内部メニュー Preset 映像の設定(ISO、FOCUS、色温度、色合い、絞り)を保存することができます。 Display Grid:ONにするとグリッド線を表示させることができます。
Status:設定をディスプレイに表示できます。 White Balance:ディスプレイにホワイトバランスを表示できます。 Exposure:ディスプレイに絞りを表示できます。 Current Time:ディスプレイに時計を表示できます。 External Outputs 主にはHDMIに出力をすることができます。Clean Video Outputは映像、Audio Outputは音声を出力することができます。 Backgrounds クロマキー用にGreenバック、Blueバックへ。背景を見せたくない方向けにBlurが選択できます。Quality設定としてHigh、Lowの選択が可能です。 Camera name ブロードキャストソフト(OBS / vMix / Wirecastなど)に表示される名前を設定することができます。 Resolution 伝送する"画面サイズ"を選択することができます。 ※4Kを利用される場合、HEVCでのご利用を推奨しております。 Video encoding [Full NDI]、[HX2] →HX2はFull NDI(100M)と比べ、最大約1/10の伝送量で同画質の映像を送出することが可能です。HEVCの場合は10M設定でFull NDIと同等となります。 ※HX2(HEVC、H.264)は有料となります。 ※HEVCの映像がWindowsのブロードキャストソフトで表示されない:WindowsのブロードキャストソフトでHEVCの映像が正しく表示されない場合「HEVC ビデオ拡張機能」をインストールするとご利用可能となります。Macでは不要となります。 NDIは、NewTek社が開発した高品質・低遅延のIPビデオ伝送規格。NDI HXはNDIの最新の "High Efficiency"バージョンで、Full NDIよりも高品質・低帯域で伝送が可能。 ※Mac OSでブロードキャストソフトを利用する場合:H.264を利用する際 Low Latency を「OFF」にしてご利用ください。HEVCの場合そのままご利用いただけます。 [SRT(HEVC、H.264)] SRTは1〜2秒ほどの遅延がありますが、キャリア回線(docomo、au、Softbank、Rakutenなど)の場合でも、低帯域で高画質な伝送が可能なため中継など外部ネットワークでも利用することができます。
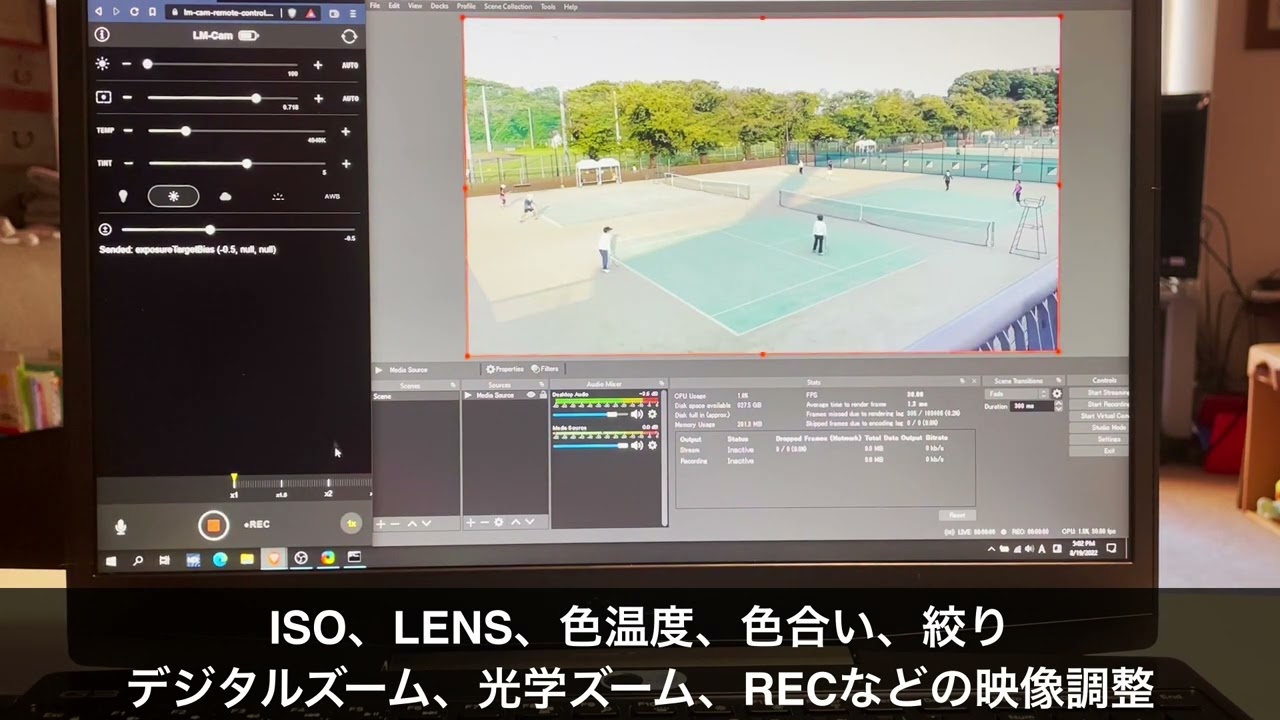
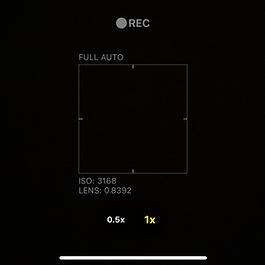
使用方法はこちら [RTMP] URLとストリームキーを入力することによって、Youtubeなどのライブ配信の際に直接配信可能となります。Bitrateは1〜20MBまで設定することができます。 [HLS] URLとストリームキーを入力することによって、Youtubeなどのライブ配信の際に直接配信可能となります。Bitrateは1〜20MBまで設定することができます。 Flip video horizontally when using front camera インカメラ時にミラーリングするか設定することが可能です。 Freme rate 伝送する"フレームレート"を選択することができます。 Bitrate 伝送する"ビットレート"を選択することができます。数値が高ければ高いほど高画質となります。 【HEVC推奨ビットレート】 4K:15M前後 1920 x 1080:9M前後 1280 x 720:6M前後 640 x 480:3M前後 Recording RECをONにすると配信中の映像をRECすることが可能となります。また、配信中に表示される画面のRECボタンを押すことでもRECをすることができます。 また、用途に応じて「Video Bitrate(2〜20MB)」の調整を行うことが可能となります。 ・Recording with overlays:ONにするとWeb CGを入れた状態でREC、OFFにするとWeb CGを入れない状態でRECが可能となります。その際RECボタンには「REC(Clean)」と表示されます。 Remote Control PC、スマートフォンのブラウザで、LM-Camを遠隔で操作することができます。 遠隔で操作できるのは、伝送ON/OFF、REC、ISO、LENS、TEMP、TINT、絞り、イン/アウトカメラ選択、音声ON/OFF、デジタルズーム、光学ズーム切り替えが可能です。 ブラウザコントロール推奨ブラウザ:Chrome、Safari -ご利用方法- Web CGのコントロールも可能 ステータスからWeb CGのON-OFF、URLの入力をすることができます。 SRT Talkback Use Talkback via SRTをONにしていただくと機能を有効にすることができます。 TalkBackご利用の際は、「有線イヤホン」、「Bluetoothイヤホン」でご利用いただくことをおすすめします。 イヤホンによってはBluetoothのマイクを利用してしまうので、映像マイクの選択は『Video』設定の「Built in Microphone」「Bluetooth Microphone」の2つから選択してください。 正常にTalkBackが繋がっている場合は、「SRT-TalkBack ONLINE」と表示されます。 Web CG Web CGをONにするとHTMLをレイヤー表示させ、SCORE CG(近日提供予定)を利用することができます。また、Recordingの設定にて"Recording with Overlays"をONにするとWeb CGを含めた状態(Dirty)でREC、OFFにするとWeb CGを含めない状態(Clean)でRECをすることができます。
[Web CG Settings] ・URL:掲載するCGのURLを設定することができます。 ・Redraw Interval:CGを反映する時間を設定できます ・Refresh Interval:うまくCGが読み込めない場合があるので設定時間に一回強制RefreshしCGを表示させます。」 [よくある質問] Q.HEVCの映像がWindowsのブロードキャストソフト(OBS、vMix、Wirecastなど)で表示されない A.「HEVC ビデオ拡張機能」をインストールするとご利用可能となります。Macでは不要となります。 Q.H.264 Low Latency=ON で使用するとMac OSでブロードキャストソフトが利用ができない A.H.264を利用する際 Low Latency を「OFF」にしてご利用ください。HEVCの場合そのままご利用いただけます。
LM-Camの"SRT"を使用して屋外or離れた場所から映像入力・遠隔操作をする方法
離れた場所の映像を取り入れ、室内の映像と合わせてスイッチングをしたい場合、LM-Camを利用することで、屋外や室内の離れた場所の映像を遠隔操作することが可能となります。 設定方法もそこまで難しくないので、離れた場所から中継をする際に是非ご利用ください。 遠隔操作の映像はこちら OBS設定方法 離れた場所から映像を飛ばす場合、SRTの利用をおすすめします。 SRTを使って送信する場合、映像を受けるにはOBSを利用します。 OBSは以下のページからダウンロードをすることができます。 https://obsproject.com/ja/download ※ご利用しているOSのOBSをご利用ください。 OBSのダウンロードが完了したらSRTの設定を行います。
※SRTの設定は複数ありますが、listenerモードで受信する方法を紹介します。 まず、OBS内のSceneを選択し「メディアソース」を選択。 メディアソースの設定は「ローカルファイル」のチェックを外し、『入力』には"IPアドレス"と"ポート番号"を入力します。 室内環境 or 屋外環境とで接続するIPアドレスの設定方法が異なります。状況に応じた接続方法をご確認ください。 ・室内環境で接続する場合:OBSと同じネットワーク間で接続となるので「ローカルIP」と「ポート番号」を入力
※ローカルIPの調べ方はこちらをご確認ください。
・屋外環境で接続する場合:OBSと異なるネットワークとなるので『グローバルIP』と開放した『ポート番号』を入力 ※グローバルIPの確認方法、ポート開放についてはこちらでご確認ください。 OBSメディアソースの「入力」設定方法 srt://パソコンのIP:ポート番号/?mode=listener 例: IP:00.000.00(グローバルIP or ローカルIP) ポート番号:xxxx srt://00.000.00:xxxx/?mode=listener ↑OBS メディアソース内の「入力」に設定します。 グローバルIPの確認&ポート開放について ・グローバルIPについて:こちらから確認することができます。今回はOBS(パソコン側)のグローバルIPをOBSに入力してください。
※上記サイトの場合グローバルIPは「あなたのIPアドレス(IPv4)」という項目となります。 ・ポート番号開放について:「ポートフォワーディング」をして開放したポート番号を入力する必要があるので、「ポートフォワーディング 開放方法」などで検索し、ポートの開放を行ってください。
※ツールなどを利用する際、セキリティー上問題が生じる場合がございますので予めご注意ください。 映像の設定方法 続いて、映像を映し出すスマートフォンの設定を行っていきます。 iPhoneアプリのLM-Camをインストールしてください。 https://www.lm-cam.net/ LM-CamをダウンロードしたらメニューからVideo encoding内にある「SRT Caller」を選択してください。 LM-Cam内のSRT "Hostname"には、パソコン側に入力した「グローバルIP or ローカルIP」を"Port"には開放した「ポート番号」を設定します。 LM-Cam SRTの入力方法 例: Hostname:00.000.00(グローバルIP or ローカルIP) Port:xxxx 映像伝送を開始 OBSとLM-Camの設定が完了したら、LM-Camから伝送をスタートするとOBS側に映像が映し出されるはずです。 エラーなどが表示される場合、パソコン側のポート開放ができていない、もしくはIPアドレスの設定が間違っている可能性がありますので、今一度ご確認ください。 まとめ SRTを利用した場合、NDIと比べて約1秒ほど遅延が大きくなりますが、それでも屋外など離れた場所であれば、それほど気にすることなく利用できるはずです。 また、SRTはビットレートを2Mでも画質は安定して利用することができ、キャリア回線からでも少ない通信量で使用できるので是非ご利用ください。
LM-CamのNDIを使用して[OBS]で配信する方法
ゲーム配信や生配信をする際に定番の配信ツールOBS(Open Broadcaster Software)を利用して、LM-Camの配信することが可能となります。 OBSは無料で使用することができ、Windows、Macに対応しているため、初めて配信をするかたでも手軽に配信することができるので初心者の方におすすめのツールとなります。 OBSを利用しての設定手順を簡単に説明いたします。 OBSダウンロード NDI pluginインストール LM-Camダウンロード OBS配信設定 1.OBSダウンロード OBSサイトにて最新版をダウンロードください。 https://obsproject.com/ja/download 対応OS:Windows、Mac 2.NDI pluginインストール LM-CamはNDIを利用して配信をしているので、OBSにはNDI pluginをアドオンする必要があります。(NDIは"IPを利用した低遅延、高画質"に映像を送出することができる技術。) https://github.com/Palakis/obs-ndi/releases 上記ページの"Asset"から対応OSにあったpluginをダウンロードしてインストールをしてください。 ※windowsの場合"obs-ndi-XXX-Windows-Installer.exe"をダウンロードください。 3.LM-Camダウンロード カメラアプリ「LM-Cam」をダウンロードしてください。 https://lm-cam.net/ ※iPhoneのみの対応となっております。 4.OBS配信設定 1.カメラアプリ"LM-Cam"を起動し「赤いボタン」をタップして送出を開始 ※スマートフォンのBluetoothはOFFにしてご利用されることを推奨しております。 ※映像送出時にOBSとLM-Camが同じネットワーク内で送出する必要があります。 2.OBSを起動し"シーン"→"ソース"を追加して「NDI Source」を選択。 ※"NDI Plugin"を正しくインストールできていない場合、「NDI Source」は表示されません。 3.NDI Sourceプロパティ内にある「Source name」からLM-Camの映像を選択。 Latency modeを"Low"に設定し、OKを押すと映像が映し出されます。 ※LM-Camの映像は同じNetwork環境でないと「Source name」には表示されませんのでご注意ください。 LM-Camの場合[Video Encoding]を"HEVC"にすることにより、Full NDI(100M)と比べ、最大約1/10の伝送量で同画質の映像を送出することが可能なので、ネットワーク帯域が低い環境でも快適に利用することができます。HEVCの場合は10M設定でFull NDIと同等となります。 ※LM-Cam:Menu → NDI → Video Encoding 映像にカクつきなどがある場合は、伝送量が低い"HEVC"で利用することをおすすめいたします。 ※HEVCの映像がWindowsのブロードキャストソフトで表示されない:WindowsのブロードキャストソフトでHEVCの映像が正しく表示されない場合「HEVC ビデオ拡張機能」をインストールするとご利用可能となります。※Macでは不要となります。 4.同様の手順で複数台のカメラをつなげることも可能となります。
LM-CamのNDIを使用して[WireCast]で配信する方法
Telestream社が開発しているブロードキャスト"WireCast"を利用しての配信方法をご案内します。 WireCastはWindows、Mac対応で、有料ソフトとなりますが、UIがスッキリしており見やすく、初心者向けのブロードキャストとなっています。また、OBSとは異なりplugin不要となりますので、すぐに利用することが可能となります。 WireCastを利用しての配信設定は以下の通り。 1.WireCastをダウンロード 2.LM-Camダウンロード 3.WireCast配信設定 1.WireCastをダウンロードしてインストール https://www.telestream.net/wirecast/overview.htm お試しで動作環境を確認するために「Start your free trial」でダウンロードしてください。 ※お試しとなりますので、配信時には"透かし"と"音声"がついて配信されます。 2.LM-Camダウンロード https://lm-cam.net/ ※iPhoneのみの対応となっております。 3.WireCast配信設定 1.カメラアプリ"LM-Cam"を起動し「赤いボタン」をタップして送出を開始 ※スマートフォンのBluetoothはOFFにしてご利用されることを推奨しております。 ※映像送出時にWireCastとLM-Camが同じネットワーク内で送出する必要があります。 2.WireCastを起動し、"クリアレイヤー"の横 + をクリックしてNDIを入力。 3.対象のスマートフォンを選択して映像を入力。(LM-Camの映像は"NDIソース"内に表示されます。) LM-Camの場合[Video Encoding]を"HEVC"にすることにより、Full NDI(100M)と比べ、最大約1/10の伝送量で同画質の映像を送出することが可能なので、ネットワーク帯域が低い環境でも快適に利用することができます。HEVCの場合は10M設定でFull NDIと同等となります。 ※LM-Cam:Menu → NDI → Video Encoding 映像にカクつきなどがある場合は、伝送量が低い"HEVC"で利用することをおすすめいたします。 ※HEVCの映像がWindowsのブロードキャストソフトで表示されない:WindowsのブロードキャストソフトでHEVCの映像が正しく表示されない場合「HEVC ビデオ拡張機能」をインストールするとご利用可能となります。※Macでは不要となります。 上記の要領で、複数のカメラを同時に接続することが可能となります。 テストを行い問題なく映像が送出されれば、有料版"By starting at $599"をご購入いただき配信をお楽しみください。 https://www.telestream.net/wirecast/overview.htm
LM-CamのNDIを使用して[vMix]で配信する方法
オーストラリアのStudioCoast 社が開発している ブロードキャスト「vMix」を利用しての配信方法をご案内します。 vMixはWindowsのみ対応で、有料ソフト(60日間無料)となりますが、非常に安定しておりスロー再生など機能面でも優位性がある中級者向けのブロードキャストとなっています。また、OBSよりとは異なりplugin不要となりますので、すぐに利用することが可能となります。 vMixを利用しての設定は以下の通り。 1.vMixをダウンロード 2.LM-Camダウンロード 3.vMix配信設定 1.vMixをダウンロードしてインストール https://www.vmix.com/software/download.aspx 「Download vMix Software」をダウンロードします。 vMixは60日間無料で全ての機能を使用することができ、以降は有料でないと使用することができません。(2021年7月9日現在)) ※上記ダウンロードページ下段にある「Download vMix Desktop Capture」では配信できませんので、ご注意ください。 2.LM-Camダウンロード https://lm-cam.net/ ※iPhoneのみの対応となっております。 3.vMix配信設定 1.カメラアプリ"LM-Cam"を起動し「赤いボタン」をタップして送出を開始 ※スマートフォンのBluetoothはOFFにしてご利用されることを推奨しております。 ※映像送出時にvMixとLM-Camが同じネットワーク内で送出する必要があります。 2.vMixを起動して左下のメニュー「Add Input」をクリック 3.Input Select内の「NDI/Desktop Capture」を選択すると、入力されている映像が表示されるので選択すると映像が映し出されます。 LM-Camの場合[Video Encoding]を"HEVC"にすることにより、Full NDI(100M)と比べ、最大約1/10の伝送量で同画質の映像を送出することが可能なので、ネットワーク帯域が低い環境でも快適に利用することができます。HEVCの場合は10M設定でFull NDIと同等となります。 ※LM-Cam:Menu → NDI → Video Encoding 映像にカクつきなどがある場合は、伝送量が低い"HEVC"で利用することをおすすめいたします。 ※HEVCの映像がWindowsのブロードキャストソフトで表示されない:WindowsのブロードキャストソフトでHEVCの映像が正しく表示されない場合「HEVC ビデオ拡張機能」をインストールするとご利用可能となります。※Macでは不要となります。 4.同じ要領で、複数のカメラアプリの映像を入力することが可能となります。
LM-CamのSRTを使用して[OBS]で配信する方法
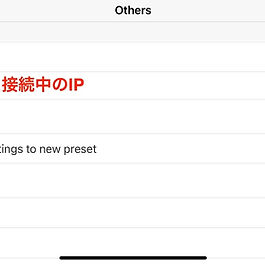
ゲームやライブ配信で使用する定番のブロードキャストソフト「OBS」ですが、LM-CamのSRTでの利用方法を説明致します。 SRTはNDIよりも遅延は大きく映像同士の同期を取るには調整が必要ですが、NDIと比べて非常に安定しており、安定感のあるプロトコルとなります。 OBSはWin、Macともに無料で利用することができ、かつPluginが豊富にあるため世界で一番利用されているブロードキャストソフトとなります。 1.OBSダウンロード OBSサイトにて最新版をダウンロードください。 https://obsproject.com/ja/download 対応OS:Windows、Mac 2.LM-Camダウンロード カメラアプリ「LM-Cam」をダウンロードしてください。 https://lm-cam.net/ ※iPhoneのみの対応となっております。 3.LM-Camの設定 OBSのダウンロードが完了したら、LM-CamのSRT設定を行います。 ※SRTの設定は複数ありますが、今回はlistenerモードで受信する方法を紹介します。 LM-CamをダウンロードしたらメニューからVideo encoding内にある「SRT Listener」を選択してください。 Hostnameは空白、Portには「49095」を入力しています。 ※IP:「接続中のIP」はOBS側に入力する際に必要となります。 LM-Cam SRTの入力方法 例: Hostname:IPは入力せず空白でOK Port:49095 4.OBSの設定 OBS内のSceneを選択し「メディアソース」を選択。 メディアソースの設定は「ローカルファイル」のチェックを外し、『入力』には「LM-Camに接続中のIP」、ポート番号は「設定した番号」を入力します。 そして、URLの最後に「?mode=caller」と入力します。 OBSメディアソースの「入力」設定方法 例: IP:00.000.00(LM-CamにつながっているIP) ポート番号:49095 srt://00.000.00:49095/?mode=caller ↑OBS メディアソース内の「入力」に設定します。 ListenerとCallerについて Listenerは軸となり接続される側で、CallerはListenerに接続し映像を受け取る側となります。これらを逆に設定したとしても映像伝送は機能します。

LM-Camを使用して"クロマキー"を利用する方法
先程_LM-Camで実装をした、背景設定(グリーンバック、ブルーバック)を利用しての「クロマキー機能」の使用方法をまとました。 どのブロードキャストソフトでも手軽に行うことができるので、是非ご利用ください。 まず最初に、LM-Camの設定としては、メニュー(Ohters)から、Backgroundsより"Green"もしくは"Blue"を選択してください。 OBS設定 標準機能としてクロマキーの機能が備わっていますので、アドインなどをインストールする必要はありません。 1. LM-Camの映像をOBSへ読み込みさせます。 2.「ソース」に入力された「NDI Source」を右クリックし「フィルタ」を選択ください。 3. エフェクトフィルタの「+」を選択し「クロマキー」を選択。 4.クロマキー内の「色キーの種類」を選択して「緑」「青」「マゼンタ」「Custom」の中から背景色にあったカラーを選択します。 ☆LM-Camの背景色を「Green」に選択した場合。 →色キーの種類「緑」を選択すると背景を透過させることができます。 ☆LM-Camの背景色を「Blue」に選択した場合。 →色キーの種類「青」を選択し「類似性を200前後」に調整すると背景を透過させることができます。 vMixの設定 1. LM-Camの映像をvMixへ読み込みさせます。 2. 映像プロパティ(歯車)をクリックし、「Colour Key」を選択します。 3. Colour Keyにチェックをし、透過するカラーを選択。 Wirecastの設定 1. LM-Camの映像をWirecastへ読み込みさせます。 2.クロマキーのプロパティを選択し、チェックボックスをONすれば背景を透過させることが可能となります。

LM-Camを立ち上げた際に自動でBluetoothをOFFにする方法
LM-CamでNDIを利用する際はBluetoothをOFFにすることが必須となります。 iPhoneの場合、再起動などをした際は自動でBluetoothがONとなってしまうため、その都度BluetoothをOFFに設定する必要があります。 都度OFFにするのは手間がかかるため、LM-Camを起動した際に自動でBluetoothをOFFにする便利なオートメーション設定方法をご説明します。 設定方法 1.iPhoneのアプリ「ショートカット」をタップ
※検索して「ショートカット」と入力すると表示されます。 2.オートメーションの「個人用オートメーションを作成」を選択 3.Appを選択し"LM-Cam"を選択し"開いている"を選択 4.アクションを追加をし検索窓から「Bluetooth」を入力 5.Bluetoothを設定をタップし、オン→オフに変更 6.実行の前に尋ねるON or OFF お好きな方を選択してください。 以上の設定を行うと、LM-Camを起動したら自動でBluetoothをOFFにすることができます。 設定方法も簡単で、一度設定をすればあとは自動で行ってくれるので、大変便利な方法なので、是非ご利用ください。

NDI Bridgeを使用して外部ネットワークからLM-Camをつなげる
NDI 5 Tools PackにパッケージされているNDI Bridgeアプリケーションは、インターネット上の異なる2つの場所であってもNDI Bridgeを利用することにより、NDI同士をつなげることが可能となります。 ※2021-12-23現在、Windowsのみで利用となりMacで利用することはできません。 必要なもの - インターネットにアクセスできる異なるネットワーク上の2台のパソコン(ここではネットワークAとネットワークBとします) - NDI 5 Tools (NDI 5 Tools Packをインストールすることにより、NDI Bridgeを使用できます。) - LM-Cam(NDIカメラアプリ) まずはじめに まず始める前に、ネットワークA(Host)に接続されているファイアウォールのポートを開く必要があります。 ファイアウォールのポートの開け方(一般にポートフォワーディングと呼ばれる)については、様々な設定があり公式サイトでの設定は、以下ページから確認することができます。 https://ndi.tv/tools/education/bridge/port-forwarding/ その他にも「ファイアウォールのポートの開け方」「ポートフォワーディング」と検索すれば、詳しく解説しているサイトで確認することが可能です。 NDI Bridgeの設定 NDI Bridge "Host"をSetting 基本的にはメインで使用するPCを「Host」とします。(ここではネットワークAとなります。) 設定項目: Groups to Share:Public Bridge Name:わかりやすい名前を入力ください。 Public IP Address:基本的には自動で入力されます。
→確認くん(https://www.ugtop.com/spill.shtml)などのサイトでパブリックIP(グローバルIP)を調べることができます。 Port:5990
→Portにはファイアウォールで開いているポート番号を入力してください。デフォルトは5990です。正常にポートが開いていない場合はローディングロゴが表示されます。 Encryption Key:共有する際のパスワード Encoder Settingsの変更も可能です。これは、NDI Bridgeが出力(インターネットからとJoinへの両方)する方法です。出力設定から「トランスコードしない」を選択すると、出力時のNDIと同じフォーマットで渡します。 必要に応じて、エンコーダーの設定を調整します。 入力が完了したら、Host画面右下の「Start」を押下します。
※Startボタンが青色になったら正常につながっています。黄色になったらうまく接続できない状態なので設定をご確認ください。 NDI Bridge "Join"をSetting 次にネットワークBのパソコンには、「Join」の設定を行います。 Joinの設定は、Groups to ShareとBridge Name以外、基本的には「Host」と同じ内容を入力します。 入力が完了したらJoin画面右下のボタン「Join」を押下します。
※Joinボタンが青色になったら正常につながっています。黄色になったらうまく接続できない状態なので設定をご確認ください。 Hostが何らかの理由でネットワークが切断した場合、Joinは自動的に再接続を試みます。 NDI Bridgeは双方向なので、『ネットワークB』と『ネットワークA』で受信しているNDIは、双方でも利用することが可能となります。 LM-Camを起動 次にネットワークA or Bどちらかで LM-Cam を起動します。 LM-Camのダウンロードはこちら https://www.lm-cam.net/ LM-Camにある、赤いボタンをタップをするとストリーミングを開始します。 NDI Bridgeが正常に設定されていれば、「ネットワークAにあるパソコン」で、「ネットワークBのパソコンで受信したLM-Cam」をNDI Studio Monitorなどで映すことができます。
※同じように「ネットワークBでもネットワークAで受信しているNDI」を映し出すことが可能となります。 もちろん、NDI Studio Monitorだけでなく、NDI入力に対応したストリーミングソフトウェアでもカメラを映し出すことが可能となります。 このような形でNDI Bridgeを利用することにより遠隔地にあるNDI映像を簡単に遅延なく取り込むことができるので、中継で出演など様々な用途で利用することができます。